I've just seen an interesting video in People's Celebrity hot spots about "Cut", the steakhouse owned by Wolfang Puck (link to the video) and a certain appetite sore... Let's leave Brangelina up to a T-bone steak and browse some Wolfgang Puck recipes on our Recipes.it Great Chefs page and decide what to cook.
On the left hand: pizza. On the other hand: vegetables or proteins. Well, I know that I should attain to my new year resolutions ;-) but it's also true that is better to have carbs for lunch so that you'll have plenty of time to burn the calories with a fast-pace walk. Interesting that dieticians' science itself says "HAVE WOLFANG PUCK'S PIZZA FOR LUNCH" and who am I to argue?
THE RECIPE:
PIZZA DOUGHYou can make four pizzas, as described below, or you can divide the dough in half and make two large 12-inch pizzas. The baking time will be the same.
Chopped fresh basil, chopped sun-dried tomatoes, or a sprinkling of crushed red pepper flakes can be added to the dough with the flour, if desired, for additional flavor. Be creative with your pizzas! For the best results, see "
Pizza Tips" below.
1. Once you have rolled the piece of dough into a ball, work it with your hands on a smooth surface by pulling down the sides and tucking under the bottom of the ball. Repeat 4 to 5 times. Roll the ball under the palm of your hand until the top of the dough is smooth and firm, about 1 minute.
2. On a lightly floured surface, stretch the dough into a small circle and begin to knead it by pressing down in the center, leaving the outer edge thicker than the inner circle.
3. Pulling and stretching it with both hands, elongate the dough into an oval.
MAKES FOUR 8-INCH PIZZAS
(makes about 24 ounces of dough)
Ingredients:1 package active dry or fresh yeast
1 teaspoon honey
1 cup warm water (105¤F. to 115¤F.)
3 cups all-purpose flour
1 teaspoon kosher salt
1 tablespoon extra-virgin olive oil or Chili and Garlic Oil (see page 20),
plus more for brushing
Topping of your choice
Directions:1. In a small bowl, dissolve the yeast and honey in 1ž4 cup of the warm water.
2. In a mixer fitted with a dough hook, combine the flour and the salt. Add the oil, your mixture, and the remaining 3ž4 cup of water and mix on low speed until the dough comes cleanly away from the sides of the bowl and clusters around the dough hook, about 5 minutes. (The pizza dough can also be made in a food processor. Dissolve the yeast as above. Combine the flour and salt in the bowl of a food processor fitted with the steel blade. Pulse once or twice, add the remaining ingredients, and process until the dough begins to form a ball.)
3. Turn the dough out onto a clean work surface and knead by hand 2 or 3 minutes longer. The dough should be smooth and firm. Cover the dough with a clean, damp towel and let it rise in a warm spot for about 30 minutes. (When ready, the dough will stretch as it is lightly pulled.)
4. Divide the dough into 4 balls, about 6 ounces each. Work each ball by pulling down the sides and tucking under the bottom of the ball. Repeat 4 or 5 times. Then on a smooth, unfloured surface, roll the ball under the palm of your hand until the top of the dough is smooth and firm, about 1 minute. Cover the dough with a damp towel and let it rest for 15 to 20 minutes. At this point, the balls can be wrapped in plastic and refrigerated for up to 2 days.
5. Place a pizza stone on the middle rack of the oven and preheat the oven to 500¤F.
6. To prepare each pizza, dip the ball of dough into flour, shake off the excess flour, place the dough on a clean, lightly floured surface, and start to stretch the dough. Press down on the center, spreading the dough into an 8-inch circle, with the outer border a little thicker than the inner circle. If you find this difficult to do, use a small rolling pin to roll out the dough. Lightly brush the inner circle of the dough with oil and arrange the topping of your choice over the inner circle.
7. Using a lightly floured baker's peel or a rimless flat baking tray, slide the pizza onto the baking stone and bake until the pizza crust is nicely browned, 10 to 12 minutes. Remember that the oven is very hot and be careful as you place the pizza into and out of the oven. Transfer the pizza to a firm surface and cut into slices with a pizza cutter or very sharp knife. Serve immediately.
TO PREPARE AHEAD: Through step 4. When ready to serve, remove the balls of dough from the refrigerator and let them rest at room temperature for about 15 minutes, then continue with the recipe. Through step 7, bake 5 or 6 minutes, until the cheese melts and the pizza dough is lightly golden brown. (At this point, the pizza can be cooled, wrapped well, and frozen for up to 1 month.) When needed, remove from the freezer, unwrap, and bake in a preheated oven until the crust has browned and the topping is heated through.
PIZZA TIPS1. In step 4, if you wrap the dough in plastic wrap and refrigerate, make certain that you wrap each ball of dough loosely but completely. Since you are working with a yeast dough, the dough will expand as it stays in the refrigerator. If it is not wrapped well, the dough will ooze out of its wrapping and harden. You may want to enclose the dough in a resealable plastic bag.
2. Make certain that you stretch or roll out the dough on a floured surface, preferably on a baker's peel, a rimless flat baking tray, or a very wide spatula that you are using to transfer the pizza to the oven.
3. Have all the ingredients ready so that you can arrange them on the pizza dough at serving time. At the restaurants we place the ingredients in separate bowls so that they are easily available when we need them.
4. In order to make the very best pizza possible, you'll need to have a mixer with dough hook (or food processor), a pizza stone, a baker's peel, a rimless baking tray or very wide spatula, and a pizza cutter or large sharp knife.
5. Make certain that the ingredients that have been sautéed are not hot when you arrange them on the pizza. This will soften the dough, and if the dough gets too soft it will be difficult to release it from the peel to the oven. Put the toppings on the pizza dough just before transferring it to the oven.
6. My recipes recommend an oven temperature of 500¤F. If your oven thermostat does not reach 500¤F., preheat it to the highest possible temperature.
7. Check the pizza after 10 minutes, since every oven bakes differently, and if it is not browned enough, continue to bake 1 or 2 minutes longer.
Copyright © 2000 by Wolfgang Puck, excerpted from "Wolfgang Puck's Pizza, Pasta, and More!"
MAY WE SUGGEST?
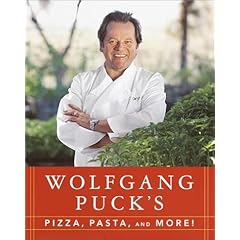 Wolfgang Puck's Pizza, Pasta, and More
Since the 1982 opening of his L.A. restaurant Spago, Wolfgang Puck has become a household name. Several restaurants, TV appearances, and cookbooks later, Puck has put together Wolfgang Puck's Pizza, Pasta, and More, a collection of his favorite and most popular recipes. "Eating with family and friends is like having a little party," says Puck. "It is pure pleasure, a relaxing and fun experience. Casual and easy to prepare, these are dishes everyone can make and enjoy."
Puck starts with the basics--stocks, sauces, dressings, and condiments. With chicken or vegetable stock fresh made or stored in your freezer, you have the base for Hazelnut Brown Butter and Herb Sauce (toss with wild-mushroom ravioli and dust with Parmesan) or Tomato Garlic Basil Sauce (good for pasta or pizza). The salads range from a classic Caesar with Homemade Tapenade Croutons to a Grilled Ahi Tuna Niçoise Salad to a colorful stacked Roasted Beet Napoleon. Thin-crust wood-oven pizzas are Puck's signature and he does not disappoint. The Herbed Artichoke Pizza is studded with sautéed artichoke bottoms, niçoise olives, and caramelized onions and the Tangy Chicken Pizza features peppers, eggplant, and chicken marinated in olive oil, lime, jalapeños, garlic, and cilantro. Try the brunch pizza with scrambled eggs and smoked salmon on a leisurely Sunday.
The pastas are equally as enticing. Puck suggests making your own and includes his fail-safe recipe. Particularly temping are Angel Hair with Wild Mushrooms, Asparagus, and Shaved Parmesan Cheese, Crispy Calamari with Chinese Noodles and Spicy Garlic Sauce, and Gnocchi with Braised Veal Shank.
Besides alluring photos of many of the dishes, pictures of Puck and his staff preparing for the 2000 Academy Awards post-party are included (FYI: Haley Joel Osment's favorite pizza is Pepperoni and Mushroom). --
Dana Van Nest
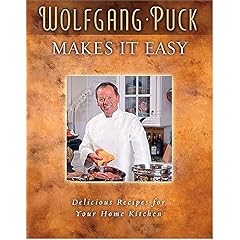 Wolfgang Puck Makes It Easy: Delicious Recipes for Your Home Kitchen
He is creator of some of the world's greatest restaurants such as Spago and Postrio. He is known for the fast-growing Wolfgang Puck Express, a line of cooking accessories, television appearances on the Food Network, and a line of soups and pizzas. He is author of five previous cookbooks. Wolfgang Puck is one of the most visible names and faces in the food business.
Wolfgang Puck Makes It Easy is a groundbreaking cookbook in which Wolfgang Puck shares his creativity and genius so that anyone can prepare these wonderful recipes. Every element of the book aims to make it incredibly easy to create great food of the highest quality and creativity, as only Wolfgang Puck can do.
In addition to more than 100 recipes, the book features numerous cooking tips as well as advice on how to select the freshest ingredients, how to adapt recipes to the season, using the right cookware, and menu and wine selections.
 Live, Love, Eat!: The Best of Wolfgang Puck
Wolfgang Puck's enthusiasm for good food could light up several small cities, and you'll find the proof on the pages of Live, Love, Eat! The Best of Wolfgang Puck. In 150 of his favorite recipes Wolfgang Puck demonstrates why and how flavorful food and fun can't be separated from each other--certainly not in his kitchen.
Consider the ubiquitous guacamole recipe. Puck calls his version California Guacamole. His ingredients are few, the flavors marshaling around roasted whole garlic, which adds to the whole an underlying sweet and mellow deliciousness. It's an act of elevation and restoration for one of the grand treats of the Southwest. Puck is a master of the respectful tweaking of familiar recipes and ingredients in favor of rejuvenation and flavor. The lowly chicken comes to mind. Chicken pot pie becomes Chicken Pot Pie Soup, Puck replacing the traditional crust with delicate dumplings. With Spicy Chicken Pizza (the chicken is marinated in lime juice, olive oil, garlic, cilantro, and minced jalapeño chilies) Puck takes this Neapolitan standard on a side trip to Mexico. Viener Backhendl, Austrian fried chicken, meets Asia by way of panko, Japanese-style bread crumbs. And so on.
Live, Love, Eat! has chapters devoted to appetizers, soups, salads, pizza and pasta, seafood, poultry, meat, accompaniments, and desserts. This is a richly illustrated book showing what results look like and how they get there. A final chapter, "Basics," is worth the price of admission. --
Schuyler IngleWANT IT CRISPY?

 Hoffritz® Crispy Pizza Pan: link
Heavy-gauge steel heats quickly and evenly. Non-stick coating on the interior and exterior of each pan for perfect release of your baked goods and easy clean up. 16 1/2" dia.

 KitchenAid® Pizza Crisper: link
This rack is perfect for crispy pizza crusts, but it's also ideal for cooling your cookies or cakes. Exclusive coating creates the world's most durable non-stick surface and easy release of your baked goods. Dishwasher safe. 14" dia.
 KitchenAid® Pizza Slider/Crisper: link
Exclusive coating creates the world's most durable non-stick surface. 15" square.
 Roshco® Pizza Baking Stone Set: link
Turn your conventional oven into a brick oven for baking scrumptious golden crusts to fresh dough or frozen pizza. Also perfect for baking breads, rolls, or cookies. Deluxe set includes 15" pizza stone, stainless steel pizza cutter, serving rack and a pizza dough recipe.
CAN'T LIVE WITHOUT WOLFGANG PUCK?

If you live miles away from his several restaurants, try Wolfgang Puck at home!
For more than three decades, Wolfgang Puck has come to represent the ultimate in the culinary arts and restaurant hospitality. The Austrian-born Puck began his formal training at age 14, inspired by his mother, Maria, a hotel chef. Encouraged by a friend, Wolfgang left Europe in 1973 at the age of 24, having already learned his craft as a classically trained French chef in the master kitchens of three-star French restaurants: the Hotel de Paris in Monaco, Maxim's in Paris, and L'Oustau de Baumaniere in Provence. After spending two years as chef at the restaurant La Tour in Indianapolis, Puck moved to Los Angeles and became both chef and part owner of Ma Maison, which quickly became a magnet for the rich and famous.
After the 1981 publication of his first cookbook, Modern French Cooking for the American Kitchen, based on his popular recipes at Ma Maison, Spago, located in West Hollywood on the Sunset Strip, was an instant success and culinary phenomenon from its opening day in 1982. His first signature dishes--such as "gourmet" pizzas topped with smoked salmon and caviar and Sonoma baby lamb with braised greens and rosemary--put him and Spago on the Los Angeles foodie map. Over its popular 18 years, the original location of Spago earned many accolades, including the prestigious Restaurant of the Year award by the James Beard Foundation in 1994.
Over a span of 20 years, an empire of Wolfgang Puck dining establishments has opened, including fine dining restaurants in Los Angeles, San Francisco, Las Vegas, Palo Alto, and Maui and casual dining and quick service restaurants in nationwide urban centers, airports, and supermarkets. In May 2000, Wolfgang Puck Worldwide, Inc., was established to manage global brand strategy across Wolfgang Puck's business activities in consumer packaged foods, cooking products, and other lines of products and media opportunities, including Wolfgang Puck's Soups, one of America's fastest-growing soups. Wolfgang's philosophy with his soups, which applies to everything he does, is straightforward. As he says, "The recipe for all my soups is simple. The finest ingredients and lots of good, honest, old-fashioned love." Wolfgang lives in Beverly Hills and has two sons, Cameron and Byron.
 Wolfgang Puck Organic Thick Hearty Vegetable Soup, 14.5-Ounce Cans (Pack of 12)
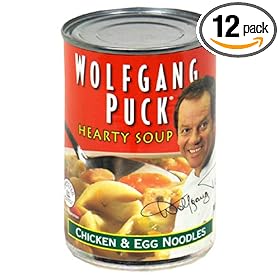 Wolfgang Puck Chicken & Egg Noodles Soup, 14.5-Ounce Cans (Pack of 12)
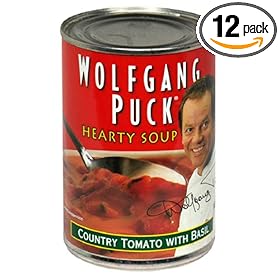 Wolfgang Puck Country Tomato with Basil Soup, 14.5-Ounce Cans (Pack of 12)
 See all Wolfgang Puck's soups
... and don't forget to browse for more Great Chefs' recipes on
Recipes.it!
 TGI Friday's Baked Potato Skins
 Nachos Grande


![[Valid Atom 1.0]](http://www.verimall.com/img/valid-atom.png "Validate my Atom 1.0 feed")

